I found myself in Kallo again a couple of weeks ago. There hasn’t been too much leisure time to shoot for Maisemassa.com lately, but now I had. I prepared for the shoot the day before: charged the batteries, emptied the SD card, practiced some slick camera moves with DJI Osmo and checked the weather forecast. The next evening was supposed to be lovely. Maybe few clouds, but overall the weather was to be sunny. Perfect for some cliche sunset footage.
As you probably figured out already, the next day was not sunny! When I checked the current weather of Kallo it said cloudy 9/8. What the hell does that even mean, I wondered. Well, it means fog, haze, mist or whatever you want to call it. Would it have been better to call off the day? Absolutely not! There is nothing more amazingly intriguing than a mystical haze floating around. If I could have asked for more, there would’ve also been a flock of bats and an abandoned ship drifting ashore. But you can’t have it all. Unless you have a massive budget or decent visual fx skills, then you can have whatever you want on the screen.
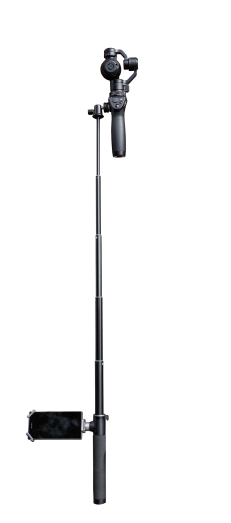
Back to the real life. All I really wanted to do was to shoot low angle smooth flying shots combined with ”jib-like” movement. I thought this kind of stuff would work nicely in Kallo. Also I wanted to see what you can do with the combination of DJI Osmo and Extension Rod. What I found out was, that you can do a lot, but there are limitations and you need to practice.
Here’s a list of thoughts
– ”The ninja walk” is essential Osmo Quick Tips: The Walk
– You can hide imperfect walking technique by filming 50 fps and slowing it down in post.
– You must walk slower when you shoot 25 fps instead of 50 fps if you want the footage to blend seemingly together in edit.
– I did use some stabilizing in post, but that was mainly because of a bad filming technique.
– Osmo + Extension Rod combo is amazingly light. You can fiddle with it hours without wearing out your arms.
– Use of ND-filters is a must. There is no aperture control on X3 camera.
– Changing ND-filters is a pain in the ass. If anyone knows a decent variable ND-filter for X3 camera, please comment below 🙂
– Image quality is decent, but not amazing. I shot only 1080p (with D-LOG profile), so can’t really say anything about the quality of 4K video.
– YouTube basically butchers the image quality. Still figuring out what is the best way to export to YouTube.
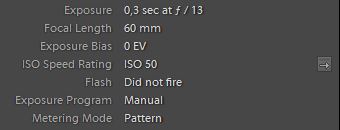
– I used ISO 200-800. I wouldn’t go over ISO 400 if I had a choice.
– You should add some sort of a horizontal handle to the Extension Rod for better grip. Still looking solution for this one.
– If you need good audio, you’ll be better off with external audio recorder. I used Zoom H1 to get some ambient sounds.
– DJI Osmo is not weather sealed, be careful. Almost soaked mine when hovering above the water.
…One mor e thing I wanted to write about is the YouTube image quality. I wrote about it earlier, but since I had some major problems with this Low Flying -video I tried couple of things to get somewhat decent streaming quality. I think I’ll get back to that subject in the next post. The working title is ”The Never-ending Fight with Export Settings”.
Gear List
- DJI Osmo with Extension Rod and Zenmuse X3 camera
- Haida NanoPro ND Kits for DJI Inspire 1
- Zoom H1 Handy Recorder
Post
- Video edited with Adobe Premiere Pro
- ImpulZ™ 35mm film emulations ( http://www.vision-color.com/impulz/ )
- Holy Grain ULTIMATEGRAIN BUNDLE ( http://holygrain.com/ )
- Music from audiojungle.net and songfreedom.com
Follow Maisemassa.com at
Facebook
YouTube
You might want to read
The best 1080p export settings for YouTube
Kallo (video)